Key Takeaways
-
Clean the inner surface of your armor carrier completely before attachment, as dirt or moisture weakens Velcro grip and adhesive bonds significantly.
-
Dry-evaporative cooling vests reach optimal cooling at 59°F within five minutes and maintain that temperature for up to three days per water fill, requiring no batteries or permanent attachment.
-
Active fan systems deliver 8 to 32 hours of battery life depending on speed setting, with most officers finding their ideal setting within one week of regular use.
-
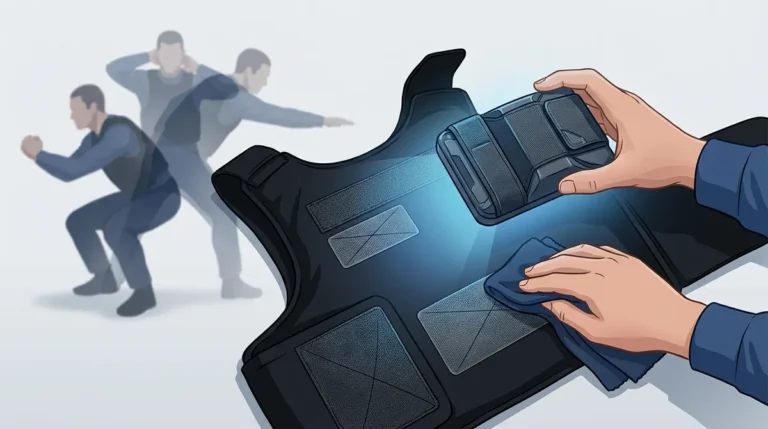
Test your cooling device’s fit and movement before your shift by doing squats, jogging in place, and twisting side-to-side to ensure it stays secure without shifting or bunching.
-
Replace adhesive patches every 30 to 60 days for reliable grip, and re-check Velcro attachments every few shifts, especially in humid conditions.
-
Avoid attaching cooling devices to dirty carriers, skipping fit tests, or forgetting to charge active system batteries nightly, as these are the most common mistakes that undermine setup effectiveness.
If you wear body armor for a living, you already know the struggle. Heat builds up fast, sweat soaks through everything, and by hour three of your shift, you’re fighting discomfort as much as anything else. The good news? Knowing how to attach a cooling device to your vest can completely change that experience. Whether you’re a patrol officer, a military service member, or a security professional, getting this setup right makes a huge difference in your daily comfort and performance.
This guide walks you through the full process — from choosing the right cooling device to securing it properly so it stays put during runs, takedowns, and everything in between. We’ll cover passive airflow vests, dry-evaporative systems, and active fan-powered units, so you can pick the method that works best for your situation. Let’s get into it.
Understanding the Types of Cooling Devices for Vests
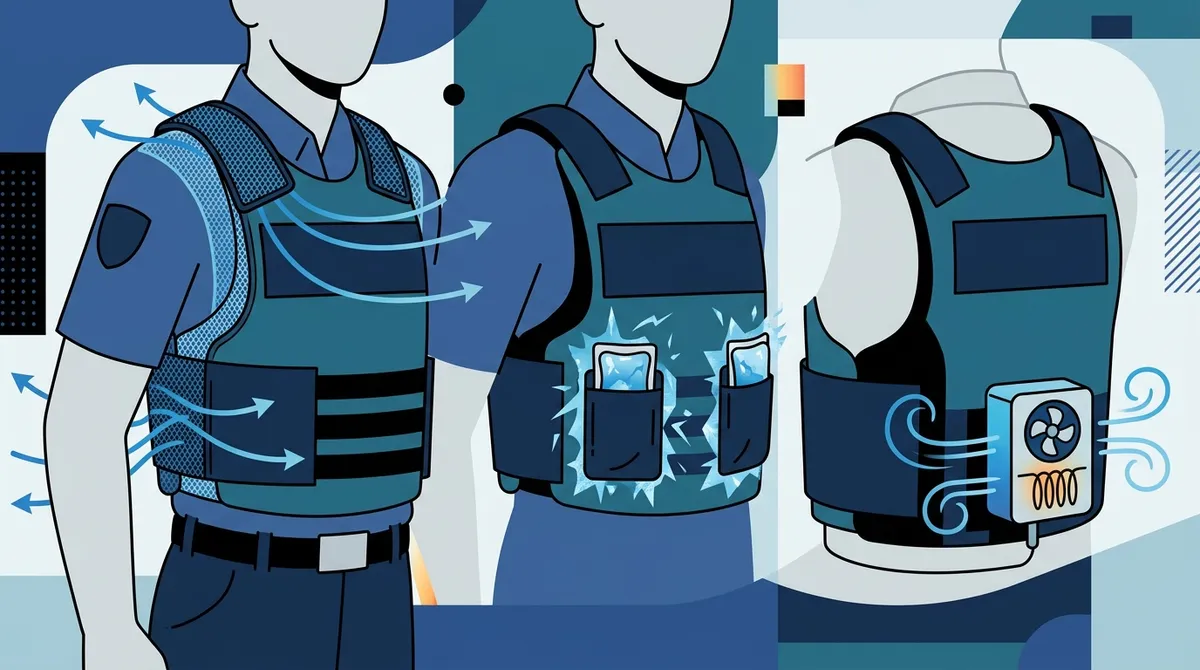
Before you start attaching anything, it helps to know what you’re working with. There are three main types of cooling devices used under body armor, and each one attaches a little differently. Knowing the difference helps you choose the right setup for your role and environment. You can also read more about passive vs. active tactical vest ventilation to help narrow things down.
| Cooling Device Type | How It Works | Attachment Method | Power Required |
|---|---|---|---|
| Passive Airflow Vest | Creates an air gap using inflatable or structured material | Velcro straps or adhesive patches | None |
| Dry-Evaporative Vest | Water-saturated membrane cools the body as it evaporates | Worn directly under armor, no permanent attachment | None |
| Active Fan System | Battery-powered fan circulates fresh air under armor | Slides under armor, secured with optional strap | Rechargeable battery |
Each type has its own strengths. Passive systems are lightweight and low-maintenance. Dry-evaporative cooling vests offer powerful immediate relief — reaching an optimal 59°F within just five minutes of activation and lasting up to three days per water fill. Active systems like the Blufano fan system deliver continuous airflow for 8 to 32 hours depending on your fan speed setting.
What You Need Before You Start
Getting the attachment right starts with a little preparation. Rushing through this step is one of the most common mistakes people make. A few minutes of prep can save you hours of discomfort and re-adjustment later. Check out these mistakes to avoid with a body armor ventilation system before you begin.
- A clean, dry inside surface on your armor carrier (dirt or moisture weakens adhesive and Velcro grip)
- Your chosen cooling device fully prepped (battery charged for active units, vest membrane dry for evaporative types)
- Velcro strips, adhesive patches, or the included strap from your device’s packaging
- A few minutes to test the fit before heading out on shift
According to the OSHA Heat Stress Guide, heat-related illness is a serious risk for workers in heavy protective gear. Having a cooling device that’s properly attached — not shifting, bunching, or restricting movement — is a basic but critical step in managing that risk effectively.
How to Attach a Passive Airflow Vest Under Body Armor
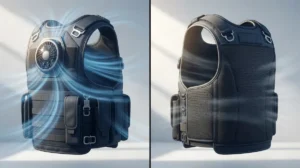
Passive cooling vests like the BluHalo ventilation vest are designed to be simple and secure. The BluHalo weighs under 7 ounces and lifts your vest up to 1.5 inches off the body when inflated, creating a cooling air gap that keeps fresh air moving against your skin. Here’s how to attach it step by step.
- Clean the inner surface of your armor carrier. Wipe it down and let it dry completely. Velcro won’t grip well on a dirty or damp surface.
- Position the ventilation vest on your torso. Place it where it will sit between your body and the armor panel — typically across your chest or back depending on your model.
- Attach using Velcro strips. Press the Velcro firmly to the inside of your carrier. Most passive vests include pre-cut strips. Press hard for a full 10 seconds to ensure a strong bond.
- Inflate on demand using the included pump. Once attached, inflate the vest to create your air gap. The BluHalo deflates instantly with a button press when you need to lie flat.
- Don your armor carrier over the vest. Put on your carrier as normal. The vest should sit flat against your body without bunching or creating visible outlines through your uniform.
- Move around and test it. Do a few squats, jog in place, and twist side to side. The vest should stay completely in place without shifting.
The goal is a setup you can install once and forget about. Learn how to use the BluHalo ventilation vest for maximum comfort to get the most out of this system from day one.
How to Attach and Activate a Dry-Evaporative Cooling Vest
Dry-evaporative vests work differently from passive airflow systems. They don’t require permanent attachment to your carrier. Instead, you wear them directly against your skin under your armor. Activation is simple and takes less than five minutes.
- Locate the fill valve. On most models, this is a small cap on the back of the vest.
- Open the cap and pour in cool, fresh water. Fill until the inner membrane is fully saturated. Do not use warm or hot water — cool water maximizes the cooling effect.
- Close the cap securely. A loose cap can leak during physical activity.
- Put on the vest and then your armor carrier over the top. The vest fits snugly against your skin and doesn’t require Velcro or straps to stay in place.
- Wait approximately five minutes. The evaporative membrane will reach an optimal cooling temperature of around 59°F and maintain that for up to three days before needing a refill.
One important note: your cooling vest should never restrict your breathing. It needs to allow full abdominal expansion. A snug fit is ideal, but if you feel any tightness while taking a deep breath, loosen it up slightly.
How to Attach an Active Fan Cooling System
Active fan systems are the most powerful option available for body armor cooling. The Blufano active fan system from BluHalo is a great example — it features a patented air-redirect spout that slides directly under any style of body armor, a built-in 10,000mAh power bank, and an adjustable control knob for fan speed. Most officers find their ideal fan speed setting within one week of regular use.
| Fan Speed Setting | Estimated Battery Life | Best Use Case |
|---|---|---|
| Low | Up to 32 hours | Long shifts, moderate heat |
| Medium | ~16-20 hours | Standard patrol, daily duty |
| High | ~8 hours | Extreme heat, high-intensity operations |
Here’s how to attach an active fan system correctly:
- Fully charge the battery before first use. Never start your first shift with a partial charge. Plug in overnight and let it reach 100%.
- Slide the air-redirect spout under the lower edge of your armor carrier. The spout should face inward, directed toward your torso for maximum airflow.
- Secure the unit with the optional attachment strap. Thread it through or around your carrier’s existing webbing or belt loops to keep the device in place.
- Set your fan speed using the control knob. Start on low and adjust based on your comfort level and shift conditions.
- Test movement and ensure no printing. Walk, crouch, and move naturally to confirm the unit doesn’t show through your uniform or shift position.
If you want a deeper dive into how this type of system works, check out how an active cooling system works in ventilation vests.
Comparing Attachment Methods at a Glance
| Attachment Method | Permanence | Best For | Risk of Shifting |
|---|---|---|---|
| Velcro Strips | Semi-permanent, removable | Passive airflow vests | Low |
| Adhesive Patches | Semi-permanent | Lightweight inserts | Low to Medium |
| Worn Under Armor | Non-permanent | Evaporative cooling vests | Very Low |
| Slide-In with Strap | Non-permanent, daily adjustment | Active fan systems | Very Low |
Tips to Keep Your Cooling Device Secure All Shift Long
Even a well-attached cooling device can shift if you’re not careful. Here are some quick tips to make sure yours stays exactly where it needs to be. For more ideas, check out 9 body armor fit and airflow tips for all-day comfort.
- Re-check your Velcro attachment every few shifts, especially in humid conditions that can weaken adhesive bonds
- Avoid over-inflating passive vests — too much inflation can cause your armor to sit unevenly on your body
- For active fan systems, route cables neatly and use cable clips to prevent snagging during movement
- If your device uses an adhesive patch, replace it every 30 to 60 days for reliable grip
- Always confirm your cooling device doesn’t print through your outer uniform before going on duty
Heat-related fatigue is a real threat to tactical performance. The National Institute of Justice Body Armor Standards emphasize proper fit and comfort as critical factors for officers who wear armor daily. A well-attached cooling device is a key part of that equation. You can also explore how to prevent heat stress while wearing body armor for more strategies.
Common Mistakes to Avoid
Learning how to attach a cooling device to your vest is straightforward, but a few common errors can undermine even the best setup. Avoid these pitfalls to get the most out of your gear.
- Attaching to a dirty carrier: Velcro and adhesive won’t hold properly on fabric with dirt, lint, or moisture buildup
- Skipping the fit test: Always test your full range of motion before heading out — a bulge or restriction you notice at home is much easier to fix than one you discover mid-pursuit
- Using the wrong attachment for your armor type: External carriers and concealed armor require different approaches — choose the right body armor ventilation vest for your carrier style
- Forgetting to charge active system batteries: A dead fan on a hot shift is worse than no fan at all — charge your unit every night just like your radio
If you want to dig deeper into avoiding errors, 12 cooling vest mistakes to avoid under body armor is a great resource to bookmark.
Start Cooler, Stay Sharper
Knowing how to attach a cooling device to your vest correctly is one of the smartest investments of time you can make before any shift. A properly installed ventilation system means less distraction, less fatigue, and more focus on the job that actually matters. Whether you go with a passive airflow vest, a water-activated evaporative system, or an active fan unit, the key is a secure, well-fitted attachment that works quietly in the background so you don’t have to think about it.
If you’re ready to explore the best cooling solutions designed specifically for professionals like you, browse the full shop at BluHalo to find the right fit for your role and armor type. And if you have questions about which system works best for your specific carrier or duty environment, don’t hesitate to reach out to the BluHalo team directly — we’re happy to help you find the perfect setup.
FAQs
Q: How do I attach a ventilation vest under my body armor without using Velcro?
A: Great question! If Velcro isn’t your thing, adhesive patches are a solid alternative — they press firmly onto the inside of your carrier and hold most lightweight cooling vests in place without any permanent modifications. Some evaporative cooling vests also require no attachment at all; you simply wear them directly against your skin and then put your armor on over the top.
Q: Can I install a cooling device on a concealed carry vest without it showing through my uniform?
A: Absolutely — and this is something worth double-checking before your first shift with a new device. Most well-designed ventilation vests and active fan systems are built to sit low-profile under both external carriers and concealed armor without ‘printing’ through your uniform. Always do a movement test in front of a mirror before heading out to confirm everything looks clean.
Q: How long does a water-activated cooling vest stay cool after filling?
A: Dry-evaporative cooling vests are surprisingly long-lasting! Once you fill the inner membrane with cool, fresh water, the vest can maintain an optimal cooling temperature of around 59°F for up to three days before needing a refill. That’s serious endurance for a system that requires zero batteries or power sources.
Q: Do active cooling fan systems require a lot of maintenance after attaching them to my vest?
A: Not at all — active fan systems like the Blufano are designed for daily duty use with minimal fuss. The main thing to stay on top of is charging the battery each night, just like you would with your radio or phone. Beyond that, a quick check of your attachment strap every few shifts keeps everything running smoothly.
Q: What is the difference between passive airflow and dry-evaporative cooling vests?
A: Passive airflow vests (like the BluHalo) create a physical air gap between your body and your armor to keep fresh air circulating — no water or power needed. Dry-evaporative vests use a water-saturated membrane that cools your skin as the moisture evaporates, delivering a more immediate temperature drop. Both attach differently and work best in different conditions, so your choice depends on your environment and personal preference!