Key Takeaways
-
Concealed armor usually lacks MOLLE or buttons, so the spout-only method (sliding the BluFano spout under an existing vest edge) is the best starting point for most slim carriers.
-
Use the optional strap only if your carrier has a compatible button or MOLLE point, and never force it or alter your armor to make it fit.
-
Aim the spout outlet into the gap between the carrier and your body, and test a chest or lower-back placement to find the spot that feels best.
-
Keep the intake and outlet clear of shirts, pouches, radios, and belts, and confirm air is moving after switching the unit on.
-
Test your setup by standing, bending, reaching, and sitting before each shift, and stop immediately if the unit shifts or changes your armor's position or coverage.
-
Never cut, sew, or modify your armor to install BluFano, and charge the unit fully before every shift since runtime varies from about 8 to 32 hours.
If you wear concealed armor, you already know the struggle. The vest is thin, the shirt is tight, and the heat has nowhere to go. You want airflow, but you also want to stay low-profile. So how do you get a fan system to stay put under all of that?
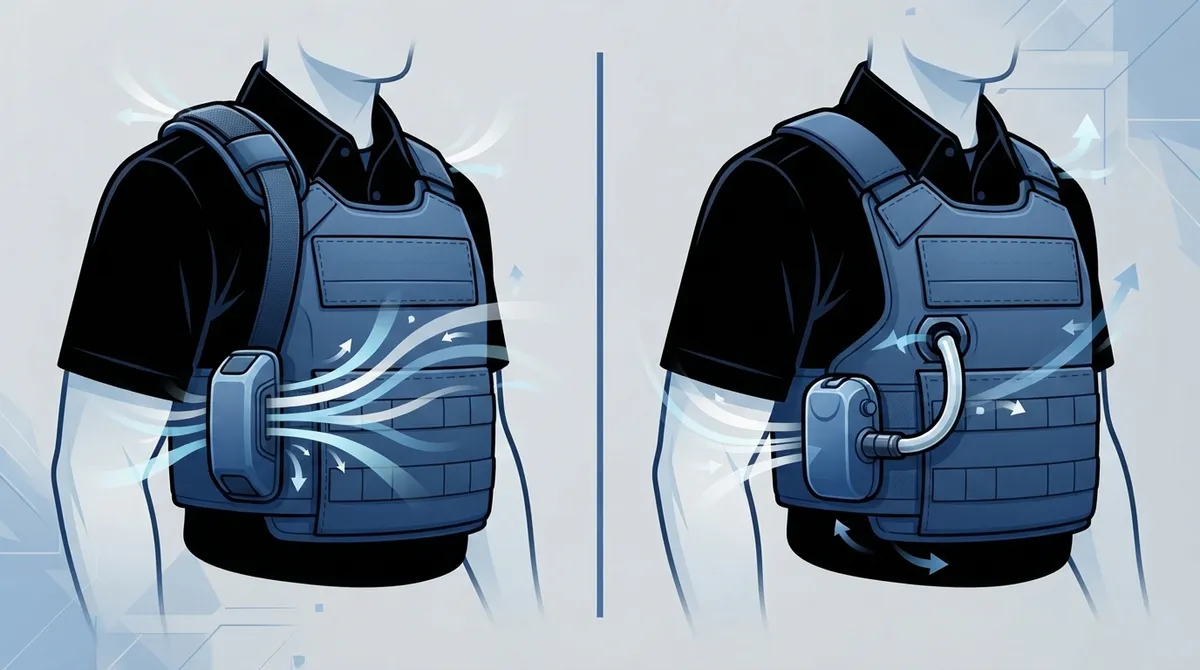
That is the big question we tackle here. Learning how to attach BluFano to concealed armor comes down to two simple approaches. You can use the spout-only method, or you can add the optional strap when your carrier has a spot for it. Each one has its place.
In this friendly guide, we compare both methods side by side. We cover where the spout should sit, what to check before you head out, and how to keep airflow flowing freely. Whether you are a patrol officer, a security professional, or a first responder, you will leave with a clear plan. Let’s get you cooler and more comfortable on your next shift.
What Is BluFano and Why Does Mounting Matter?
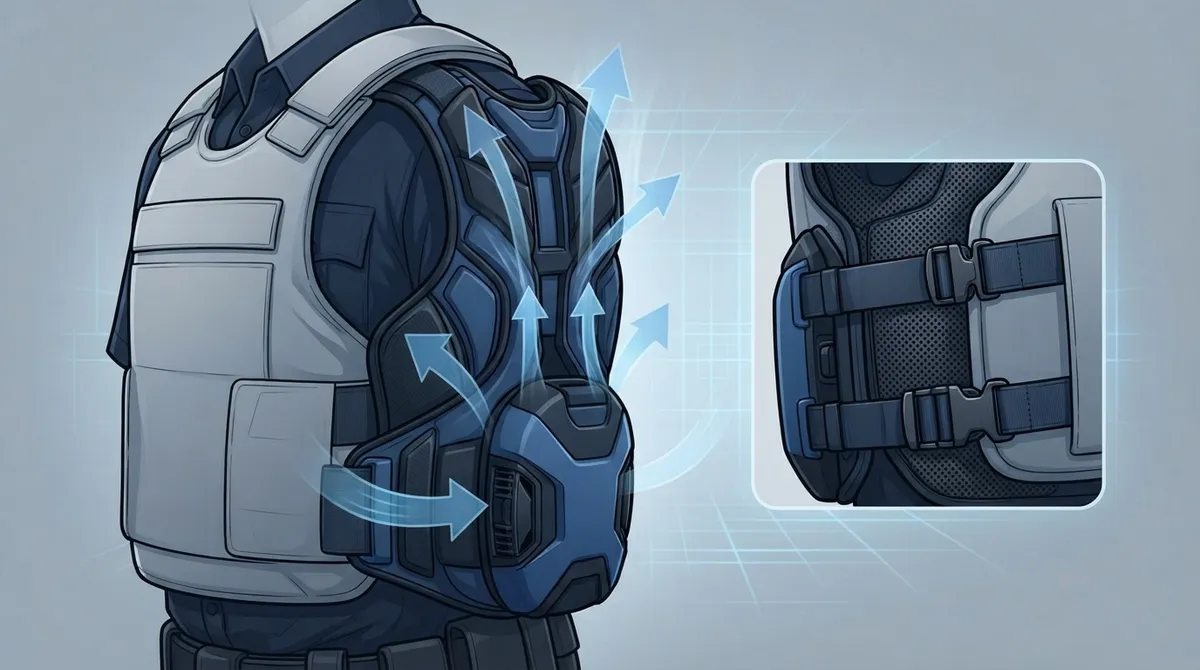
BluFano is a compact, battery-powered ventilation unit from BluHalo. It uses a fan and an air-redirect spout to push air into the space between your body and your armor. According to the maker, it weighs about 11.5 oz and includes a 10,000 mAh power bank. Runtime is listed at roughly 8 to 32 hours, depending on the fan setting.
Here is the key point: BluFano is an accessory. It is not armor, and it does not replace a ventilation vest. Think of it as an airflow helper that works with the gear you already wear.
Mounting matters because a fan only helps if the air goes where you need it. If the spout points the wrong way, or the unit bounces around, you lose the cooling benefit. A poor setup can also bother your fit or slow you down. A good setup feels almost invisible.
If you want a deeper look at how the unit performs, check out this BluFano vest cooling fan review.
Concealed Armor vs. Outer Carriers: Why Attachment Is Different
Most mounting guides focus on outer carriers. Those vests often have MOLLE webbing, buttons, and plenty of edges. Concealed armor is different. It is slim, smooth, and made to hide under a shirt.
That means fewer attachment points. You may not find a MOLLE loop or a button anywhere. So the way you attach BluFano needs to adapt.
If you are curious about the outer carrier method, our guide on how to mount BluFano on an outer vest walks through it. For concealed setups, the approach is a bit more flexible, and a bit more about careful testing.
The Two Main Methods: Spout-Only vs. Strap-Assisted
BluFano’s air-redirect spout is designed to slide under the edge of your vest. The maker also describes an optional stretchy strap that can attach to a compatible vest button or MOLLE point. Those two features give you two ways to mount the unit.
Method 1: Spout-Only Mounting
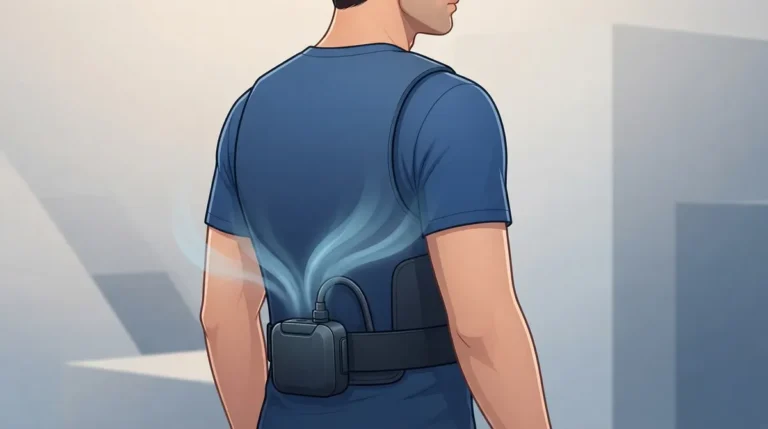
With this method, you slide the spout under an existing vest edge. You aim the outlet into the space between the carrier and your body. No strap is needed. The unit rests against your gear and your clothing.
This is the simplest option. It works well when your concealed carrier has no attachment points at all. It also keeps your setup clean and low-profile.
Method 2: Strap-Assisted Mounting
With this method, you do everything above and then add the optional strap. The strap helps steady the unit by tying it to a compatible button or MOLLE point. That extra hold can help when you move a lot.
The catch is simple. Many concealed carriers do not have a suitable point. If yours lacks one, the strap may not be usable. Never force it, and never alter your armor to make it fit.
Side-by-Side Comparison
Here is a quick look at how the two methods stack up for concealed armor.
| Feature | Spout-Only | Strap-Assisted |
|---|---|---|
| Setup time | Very quick | Slightly longer |
| Needs attachment point? | No | Yes (button or MOLLE) |
| Works with smooth concealed carriers? | Yes | Only if a compatible point exists |
| Stability during movement | Depends on fit | Often steadier |
| Low-profile feel | Excellent | Good |
| Best for | Slim, plain carriers | Carriers with a safe anchor point |
For most concealed setups, spout-only is the starting point. Add the strap only if your carrier truly supports it.
Step-by-Step: How to Attach BluFano to Concealed Armor
Ready to set it up? Follow these steps. Take your time, and remember that every carrier is a little different.
- Put on your armor first. Wear and adjust your concealed vest exactly as you normally do. Your armor should sit in its usual position before you add anything.
- Find a natural opening. Look for an existing edge or gap where the spout can slide in. Good spots are often near the chest or lower back, depending on your carrier and comfort.
- Slide the spout under the panel. Gently guide the spout beneath the vest edge. Do not force it. If it will not fit easily, try a different spot.
- Aim the outlet into the body space. Point the outlet toward the gap between the carrier and your body. This is where the airflow does its job.
- Add the strap only if it fits. If your carrier has a compatible button or MOLLE point, attach the optional strap to steady the unit. If not, skip this step.
- Check the intake and outlet. Make sure nothing blocks either one. Shirts, straps, pouches, radios, and belts can all get in the way.
- Turn it on and feel the airflow. Switch the unit on and confirm air is moving under your armor. If the air feels weak or blocked, adjust the spout angle.
- Test your movement. Stand, bend, reach, and twist. Make sure nothing shifts, pinches, or pulls your armor out of place.
That last step is the most important. A setup that looks good standing still can fail the moment you sit in a patrol car.
Where Should the Spout Sit Under Concealed Armor?
The best spot depends on your body and your carrier. Two common choices are the chest area and the lower back.
Chest Placement
A chest-area spout can push air across your torso, where heat often builds. It can feel direct and refreshing. Just watch for clearance with seat belts, radios, and shirt buttons.
Lower-Back Placement
A lower-back spout can work well when you sit for long periods. The back is a heat trap, especially against a seat. This spot may also stay out of the way of front gear. Check that your duty belt does not press on the unit.
Try one spot at a time. Give each a short test, then pick the one that feels best. For more on this, our guide on how to position a fan under body armor for best airflow covers the details.
Keeping Airflow Clear: A Quick Checklist
Airflow is the whole point. A blocked fan is just extra weight. Use this quick list before every shift:
- Keep the intake free of fabric, straps, and pouches.
- Keep the outlet pointed into the body-to-carrier gap.
- Check for pinching from your belt or shirt.
- Make sure radios and cords do not press on the unit.
- Confirm the fan is moving air after you switch it on.
If you notice weak airflow, shift the spout slightly. Small changes can make a big difference.
Safety First: Respect Your Armor
Your armor protects your life, so treat it with care. Do not cut, sew, puncture, or otherwise modify your armor or its carrier to install BluFano. Follow your armor maker’s instructions at all times.
Also remember that the information available comes from manufacturer and retailer materials. It is not independent fit or ballistic testing. So test your own setup, and stop if anything seems off. Stop right away if the unit shifts, causes discomfort, changes your armor’s position or coverage, or gets in the way of normal movement or duty tasks.
If you are unsure about fit or protection, ask your armor manufacturer or a qualified armor professional. For general guidance on armor, the NIJ body armor resources are a trusted starting point.
Why Cooling Matters on Every Shift
Heat is not just annoying. It affects focus, energy, and safety. The OSHA heat exposure guidance explains how heat stress can build up and why prevention is so important. Wearing armor adds to that load, since it traps warmth against your body.
That is why airflow tools matter. A small fan can help move trapped heat and moisture away from your skin. To learn more about managing this problem, read our guide on how to prevent heat stress while wearing body armor.
Pairing BluFano with BluHalo for More Cooling
Want even more relief? BluHalo and BluFano work as a team. BluHalo is a lightweight ventilation vest designed to lift your armor off your body. When inflated, it can create an air gap of up to about 1.5 inches. It weighs under 7 ounces and lies flat when deflated.
BluFano then pushes fresh air through that gap. The result is more space and more moving air. If you want to see how the two fit together, our guide on using BluHalo and BluFano together explains each step. For a head-to-head look, see BluFano vs. BluHalo.
Many customers also choose to bundle the two for extra savings. You can browse both in the BluHalo shop.
So, Which Method Wins for Concealed Armor?
Here is the honest answer. For most concealed carriers, the spout-only method is the best place to start. It is simple, quick, and does not depend on special attachment points. Most slim carriers do not have those points anyway.
The strap-assisted method wins when your carrier has a safe, compatible button or MOLLE point. In that case, the strap can add steadiness during movement. Just never force it where it does not belong.
The real winner is the method that stays comfortable, keeps airflow clear, and leaves your armor exactly where it should be. Test both if you can, and trust what you feel during a full range of motion.
Tips for a Full-Shift Setup
- Do a dry run at home. Test your setup before your first shift so you are not guessing on duty.
- Check again mid-shift. Long days can shift gear around. A quick check keeps things in place.
- Charge before you go. Start every shift with a charged unit so cooling lasts all day.
- Pick the right speed. Lower settings stretch runtime, while higher settings give stronger airflow.
- Keep it clean. Wipe down the unit after use to keep it fresh and ready.
Small habits like these make a big difference in comfort. For more ideas, check out these tips for wearing body armor comfortably in heat.
Ready to Stay Cooler Under Concealed Armor?
You do not have to suffer through hot, sticky shifts. With the right attachment method, BluFano can bring steady airflow under your concealed armor without adding bulk. Start with the spout-only method, add the strap when it fits, and always test your setup before you rely on it.
Have questions about your specific carrier or how to get the best fit? Reach out to the BluHalo team and we will help you find the best setup for your gear. Stay cool, stay focused, and stay safe out there.
FAQs
Q: How do you attach BluFano to a concealed vest?
A: Put on your armor first, then slide BluFano’s spout under an existing vest edge with the outlet aimed into the space between the carrier and your body. If your carrier has a compatible button or MOLLE point, you can add the optional strap for extra steadiness. Always test your movement before heading out.
Q: Does BluFano need MOLLE or a vest button to stay in place?
A: No, it does not. The spout can slide under a vest edge without any attachment point, which is handy for slim concealed carriers. The optional strap only works if your vest has a compatible button or MOLLE point, so it may not be usable in every setup.
Q: Will BluFano change the fit or concealability of my armor?
A: It can, depending on your carrier and clothing, so it is smart to check your fit before each shift. Stand, bend, and reach to make sure nothing shifts or bulges. If it changes your armor’s position or coverage, stop using that setup and ask your armor maker or a qualified professional for advice.
Q: How can I keep BluFano’s airflow outlet from getting blocked?
A: Keep the intake and outlet clear of shirts, straps, pouches, radios, and your duty belt. After you switch the unit on, feel for steady air moving under your armor. If airflow seems weak, nudge the spout angle until the air flows freely.
Q: Can I wear BluFano under body armor for a full shift?
A: Many people do, and the maker lists a runtime of about 8 to 32 hours depending on fan speed. Runtime can vary with your settings and use, so start each shift charged. Check your setup now and then during long days to keep everything comfortable and in place.